Archives

5

[2011] Hikayat Merong Mahawangsa


http://www.imdb.com/title/tt1784670/ | Release Date: 10 March 2011 (Malaysia) | Country: Malaysia | Language: English | Subtitle: Malay Hardsubbed | Genres: Action | Adventure | Size: 420MB | Quality: DVDRip
Plot: The Malay Chronicles: Bloodlines (released in Malaysia as “Hikayat Merong Mahawangsa”) is an adventure feature film set against the backdrop of ancient Malay, Roman and Chinese civilizations. It tells the tale of the journey of Merong Mahawangsa escorting a Roman prince to wed a beautiful Chinese princess during the 2nd century. Featuring an international cast, The Malay Chronicles: Bloodlines combines elements of romance, adventure, coupled with a strong dose of hand-to-hand combat & martial arts.

Mediafire
0

Changing Blogger Icon

wabit.ent 22.4.11
1. Prepare an image, can be JPG or PNG format. I suggest PNG format because its size will be smaller by a 4:1 ratio. It means that a 10 Kb JPG image will be a 2.5 Kb in PNG format. Also make sure the size is small like 20 x 20 pixels or less, so the file will be smaller in size and won't make your blog loads slower.

If it's difficult for you to edit a small image, you can make a bigger one first, like 200 x 200 pixels or more, and after finish, you can skew it smaller. Microsoft Paint can do it for you easily.

2. Upload the image to an image hosting service, like the free PhotoBucket. Then, obtain the direct link to your image for the next step. You can use another image hosting service if you like, just remember to get the direct link.

3. Add this bold tags to your template. To access it, click "edit html" in "layout" section. Put them in head section, between "title" tag and "b:skin" tag. If you face difficulties in finding the tag, just use the find tool in your browser. In Mozilla Firefox, the shortcut is ctrl+f. If you use another browsers, apply with adaptation.

<title><data:blog.pagetitle>
<link href='put the direct URL of your image here' rel='shortcut icon' type='image/vnd.microsoft.icon'/>
<b:skin>

Save and done! Visit your blog, open a few tab, and you should see your new icon there. It is very simple, so feel free to try it.
0

Flash Animation in Blogpost

wabit.ent 16.4.11 ,

Hye everyone. This time I will show you how to put flash animation on your blog post. Since blogspot didn't provide utilities for uploading flash animation (such as in .swf format), then you have to upload it first on any web-hosting platform.

Click on Edit HTML and under that tab, copy and paste the following codding


<embed height="564" pluginspage=" http://www.macromedia.com/go/getflashplayer" 
src="type your URL here" 
type="application/x-shockwave-flash" width="624"></embed></div>

Example:
<embed height="564" pluginspage=" http://www.macromedia.com/go/getflashplayer" 
src="http://fc03.deviantart.net/fs70/f/2010/203/8/4/The_Barber_And_The_Client_by_Nayzak.swf" 
type="application/x-shockwave-flash" width="624"></embed></div>

that's it!! simple right.

you can see the example of Flash Animation that I've put on my blog post here


0

Related Post With Thumbnail Widget (custom made Link Within)

wabit.ent 15.4.11 , ,


Yesterday night I've done my research on how to set codding for a 'Link Within' alike function. Thanks to the author for the tutorial on how to install the widget with coding provided. Here is some reasons why I prefer this coding rather than Link Within:
  • the thumbnails' size is in appropriate size.
  • easy for the customization of the widget.
  • the number of related posts can be adjusted beyond the default 5.
  • and one more thing is that, the traffic is not directed elsewhere when thumbnails are clicked, so download speed of blog's contents is not hampered. From my reading, it is said that, LinkWithin directs traffic to its own site before redirecting back to our site, and thus slows down page download.

Are you ready for the excitement? simply follow these easy steps on
how-to install the Related Posts with thumbnails widget :
by Aneesh's tutorial at Blogger Plugins.

  1. First, ensure these 3 criteria are met to enable this widget to work:
    a) should label all your posts as the widget fetches related posts bearing the same label with the current entry;
    b) should have posted images in your posts for best display, otherwise the default image will be shown instead;
    c) should have enabled your blog's feeds at Settings --> Site Feed.

  2. Sign in to your Blogger account. At Dashboard, click Design | Edit HTML. Before editing your blog's template, it's advisable to do a backup of it first, by clicking Download Full Template. Then, make sure that you check the Expand Widget Templates box, located on the right.

    Screen shot of Blogger's Edit Template for tutorial on Related Posts widget

  3. Next, use the browser's search function (press Ctrl+F keys) to find the following code: </head> and replace it with the following code snippet :

    <!--Related Posts with thumbnails Scripts and Styles Start-->
    <!-- remove --><b:if cond='data:blog.pageType == &quot;item&quot;'>
    <style type="text/css">
    #related-posts {
    float:center;
    text-transform:none;
    height:100%;
    min-height:100%;
    padding-top:5px;
    padding-left:5px;
    }

    #related-posts h2{
    font-size: 1.6em;
    font-weight: bold;
    color: black;
    font-family: Georgia, &#8220;Times New Roman&#8221;, Times, serif;
    margin-bottom: 0.75em;
    margin-top: 0em;
    padding-top: 0em;
    }
    #related-posts a{
    color:black;
    }
    #related-posts a:hover{
    color:black;
    }

    #related-posts a:hover {
    background-color:#d4eaf2;
    }
    </style>
    <script type='text/javascript'>
    var defaultnoimage="https://blogger.googleusercontent.com/img/b/R29vZ2xl/AVvXsEjK_AAnwc-vdzUdIs5FQCRfoxpnkhkpxdLt6eHNcYbJG_D7nRAlCcyA8wDB_UyX5yLab6GFXl5OCFIDLNrdIzYocAr71TXOH9gHYGsEFtXbfFVDpGRDZ-JUD4IFYpBVZ8mehUZ4fclY_q0/s400/noimage.png";
    var maxresults=5;
    var splittercolor="#d4eaf2";
    var relatedpoststitle="Related Posts";
    </script>
    <script src='http://blogergadgets.googlecode.com/files/related-posts-with-thumbnails-for-blogger-pro.js' type='text/javascript'/>
    <!-- remove --></b:if>
    <!--Related Posts with thumbnails Scripts and Styles End-->
    </head>

  4. Next, find this line of code: <div class='post-footer'> and place immediately below it, the following code snippet :

    <!-- Related Posts with Thumbnails Code Start-->
    <!-- remove --><b:if cond='data:blog.pageType == &quot;item&quot;'>
    <div id='related-posts'>
    <b:loop values='data:post.labels' var='label'>
    <b:if cond='data:label.isLast != &quot;true&quot;'>
    </b:if>
    <script expr:src='&quot;/feeds/posts/default/-/&quot; + data:label.name + &quot;?alt=json-in-script&amp;callback=related_results_labels_thumbs&amp;max-results=6&quot;' type='text/javascript'/></b:loop>
    <script type='text/javascript'>
    removeRelatedDuplicates_thumbs();
    printRelatedLabels_thumbs(&quot;<data:post.url/>&quot;);
    </script>
    </div><div style='clear:both'/>
    <!-- remove --></b:if>
    <b:if cond='data:blog.url == data:blog.homepageUrl'><b:if cond='data:post.isFirstPost'>
    <a href='http://www.bloggerplugins.org/2009/08/related-posts-thumbnails-blogger-widget.html'><img style="border: 0" alt="Related Posts Widget For Blogger with Thumbnails" src="http://image.bloggerplugins.org/blogger-widgets.png" /></a><a href='http://bloggertemplates.bloggerplugins.org/' ><img style="border: 0" alt="Blogger Templates" src="http://image.bloggerplugins.org/blogger-templates.png" /></a>
    </b:if></b:if>
    <!-- Related Posts with Thumbnails Code End-->

  5. Usually, you will click Preview to see the changes but take note that somehow the changes wouldn't show up in the preview for this widget (is it because it's designed not to appear on the homepage by default, I wonder?). So, best to check again that your additions are correctly placed to be doubly sure. Then only, click Save Template and View Blog.

  6. That's all to it! The image below shows how the Related Posts widget would appear, resulting from Aneesh's script code above. It will appear only on the posts' pages. If you want it to appear on the homepage as well, you have to customize the widget following step 6 below (do this after you've COMPLETED ALL THE STEPS ABOVE)

Truly a fantastic Related Posts widget with thumbnails which can be easily customized by yourself to suit your style! Some changes were made in mine as seen below where the widget's title and fonts were changed and spacing between thumbnails increased, to name a few!


Widget Customization
To configure your widget, you need to go back to the above codes at Design --> Edit HTML (remember to check the Expand Widget Templates box) and make the necessary edits, such as :
  1. To change the title of the widget, find var relatedpoststitle="Related Posts";
    and replace the words, Related Posts with whatever you like.

  2. To change the colour of the splitter line, find var splittercolor=#d4eaf2";
    and edit the color code. Best to use the colour of your post background if you wish the line invisible.

  3. To adjust the number of related posts to show, find var maxresults=5;
    and edit the value.

  4. To adjust the space between thumbnails, find #related-posts a{
    and add: margin: 0px 3px below it. The value 3px is for left and right margins, you can increase or decrease as wish.

  5. To change and restyle the fonts, margins and others, you will need to modify the relevant CSS. Learn more about CSS styling at W3Schools, one of my favourite resource center!

  6. To display the Related Posts on every page, that is, the post pages plus the homepage as well, find and remove these 2 lines from both the script code at Steps 3 and 4 above :
    <!-- remove --><b:if cond='data:blog.pageType == &quot;item&quot;'>
    and
    <!-- remove --></b:if>

  7. To edit the default thumbnail which is the image displayed when your post has no image, replace the URL that appear after this line of code:
    var defaultnoimage=" to the URL of your own created image.
again, thanks to JACQ's for the tutorial.

      0

      Download Streaming Video on Ubuntu

      For regular Windows user, usually there are a lot of softwares to capture Streaming videos on the website. As from my previous experience, I will use Internet Download Manager (IDM) as it provides the best download management to me. However, when I'm starting moving to Linux, I've founded that there is no Internet Download Manager version for Linux. So after few hours searching over the inter net, I've founded the best replacement for IDM that called, FlashGot.

      It is an extension for Mozilla Firefox. You can simply install it by clicking to this link.

      How to use this extension:
      1. Click play button on the video. This icon will appear.


      2. Click on the icon. Your download Will start automatically as you close the website of which you want to download the video.


      Simple right?

      0

      Installing Crossover Linux using terminal

      Crossover Linux is a platform or as the layman term sounds as 'Emulator' to run Microsoft based softwares on Linux based operating system.

      In this post, I will show you step by step to install Crossover Linux in proper steps.

      1. After downloading the software, locate it under 'home/username/'
      2. Then open the terminal. And type the following command

      sudo sh install-crossover-pro-x.x.x.sh


      *note that you must type exactly the same version of crossover linux that you have downloaded.. for what I've done is, i typed

      sudo sh install-crossover-pro-9.0.0.sh

      then press enter. key in your password and again, press enter.


      Once the installation finished, exit the terminal and now you can launch Crossover Linux from your OS.
      0

      Installing Microsoft Office 2007 in Ubuntu 10.10

      Hye everyone. Yesterday night, I've tried installing Microsoft Office 2007 in Ubuntu 10.10 via a platform called Crossover Linux. Congrats to Codeweaver for producing such a great 'emulator' for installing Microsoft based softwares.

      In this post I would like to share some steps in installing Microsoft Office to Ubuntu 10.10.

      Before we get started, here is a few things that need to be settled down before we proceed with installation process.

      1. Download latest version of Crossover Linux. (click here if you have problem in installing Crossover Linux)
      2. You must have the installer for Microsoft Office 2007
      3. A stable Internet connection

      Okay, now we can proceed with the steps of installation
      1. Launch Crossover Linux by selecting 'Install Windows Software'
      2. under 'Support Applications' choose Microsoft Office 2007
      3. Click on 'Select an Installer'. Then choose the installation directory of your MS office installer. (usually the installer is denoted as 'Setup.exe') then click open.
      4. then click install
      5. Now the installation process will begin as usual. There might be delay when you are to insert the serial number. (you have to wait for few seconds until the 'right' sign appear)

      6. Install as usual. Upon finishing the installation process, it is advised to restart you machine.
      7. Now you can enjoy using MS Office 2007 in your Ubuntu machine.

      0

      Installing OSX theme in Ubuntu 10.10

      Salam. Hye everyone. Today I would like to share tips and tricks on installing the OSX theme on Ubuntu 10.10. By using Macbuntu developed by sourceforge.net.


      I've tried it and it looks similar to OSX!! If you're using the new Ubuntu 10.10 Maverick Meerkat, type the following in your terminal

      wget https://downloads.sourceforge.net/project/macbuntu/macbuntu-10.10/v2.3/Macbuntu-10.10.tar.gz -O /tmp/Macbuntu-10.10.tar.gz
      tar xzvf /tmp/Macbuntu-10.10.tar.gz -C /tmp
      cd /tmp/Macbuntu-10.10/
      ./install.sh


      the software will automatically install all themes and icons to make your GUI (graphic user interface) to be like an OSX based machine.


      If you are not familiar in installing ubuntu softwares via terminal, you can directly install it via this link


      0

      To do list after installing Ubuntu 10.10

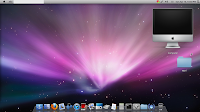
      Salam. I've just finished installing the latest version of Ubuntu on my machine. I used Ubuntu 64bit as im using AMD based laptop. I've also downloaded the OSX theme which provided by Macbuntu Project.

      Thanks to the indexer for the tweaks
      Yep it’s this time of the year again!!! with the fresh baby from Ubuntu, Maverick Meerkat, yep10.10. It didn’t escape from its predecessors attributes : being better than the previous release, more changes to make the user experience better, etc…Some of the noticeable changes are a fast boot, a new font dubbed “Ubuntu Font Family” which is great actually, a richer UX addition on the music experience from the notification bar, more social by default…Some changes you may not notice are the removal of “aptitude” package manager by default keeping only “apt-get”, a new repository for Third parties developers who want to ship their latest softwares located at http://extras.ubuntu.com/ubuntu…Ok let’s customize the beast :)

      1 – Expand the Software Repository List

      First of all, lets make Ubuntu “see” more packages. Go to the terminal and edit your sources.list with :

      sudo gedit /etc/apt/sources.list

      Here is the content of my sources.list which I think is quite complete to have all the necessary applications you could ever need. So delete the whole content of your sources list and replace it with the content of mine

      Save it. Now import the necessary repositories keys to avoid “apt-get” crying about some missing keys, go to the terminal and type:

      sudo apt-key adv --recv-keys --keyserver keyserver.ubuntu.com DCF9F87B6DFBCBAE F9A2F76A9D1A0061 A040830F7FAC5991 2EBC26B60C5A2783

      Get your system up to date with :

      sudo apt-get update && sudo apt-get dist-upgrade

      Now all your programs will run on the last version.

      2 – Anti-Virus

      Windows equivalent : AVG AntiVirus, NAV, TrendMicro, F-Prot, Kaspersky, …

      Ubuntu equivalent : ClamAV, Avast

      ClamAV

      sudo apt-get install clamav clamtk

      Access it through System Tools → Virus Scanner .

      Avast

      wget http://files.avast.com/files/linux/avast4workstation_1.3.0-2_i386.deb && sudo dpkg -i avast4workstation_1.3.0-2_i386.deb

      Access it through Accessories → avast! Antivirus .

      3 – Essential tools for compiling from sources

      sudo apt-get install build-essential checkinstall cdbs devscripts dh-make fakeroot libxml-parser-perl check avahi-daemon

      4 – Java runtime environment

      Java is a very important thing to install, now that many programs like Azureus need it to run. So type:

      sudo apt-get install sun-java6-jre sun-java6-plugin equivs

      6 – Multimedia

      Windows equivalent : windows media player, real player, vlc, mplayer

      Ubuntu equivalent : vlc, mplayer, helix player

      To have Ubuntu playing all kinds of stuff, you need to install many codecs. So on the Terminal, type:

      * Installing vlc and mplayer (plays almost everything):

      sudo apt-get install vlc mplayer

      * Common packs

      sudo apt-get install libxine1-ffmpeg gxine mencoder mpeg2dec vorbis-tools id3v2 mpg321 mpg123 libflac++6 ffmpeg libmp4v2-0 totem-mozilla icedax tagtool easytag id3tool lame nautilus-script-audio-convert libmad0 libjpeg-progs libquicktime1 flac faac faad sox ffmpeg2theora libmpeg2-4 uudeview flac libmpeg3-1 mpeg3-utils mpegdemux liba52-0.7.4-dev

      * Gstreammer 0.10

      sudo apt-get install gstreamer0.10-ffmpeg gstreamer0.10-fluendo-mp3 gstreamer0.10-gnonlin gstreamer0.10-pitfdll gstreamer0.10-sdl gstreamer0.10-plugins-bad-multiverse gstreamer0.10-schroedinger gstreamer0.10-plugins-ugly-multiverse totem-gstreamer

      * More programs

      sudo apt-get install gstreamer-dbus-media-service gstreamer-tools ubuntu-restricted-extras

      * Enable dvd support

      sudo apt-get install libdvdread4 && sudo /usr/share/doc/libdvdread4/./install-css.sh

      * Flash

      sudo apt-get install gsfonts gsfonts-x11 flashplugin-nonfree

      7. Tweak your eyecandy

      Ubuntu 10.04 comes with compiz fusion effects OOTB but doesn’t offer a way to customize them.

      In a terminal copy/paste this:

      sudo apt-get install simple-ccsm

      Now navigate to System → Preferences → Simple CompizConfig Settings Manager .

      8 – Missing Windows software?? Run Windows softwares in Linux!!!

      Run Windows Applications such as 7zip, Google Sketchup, AutoCAD, Dreamwaver, Flash MX, Fireworks MX, IE6, IE7, Safari, Itunes, Windows Media Player and many more…

      Play Windows Games in Linux like Age Of Empires, Call Of Duty, Diablo, Fear, Fallout, Far Cry, Grand Theft Auto, Half Life, Halo, Hitman, Max Payne, Need For Speed, Prince Of Persia, Sim City Star Wars, The Simsworld of warcraft , Tomb Raider, Warcraft, World Of Warcraft, Counterstrike and many other can be played.

      Install Playonlinux. It’s based on wine. Wine is a compatibility layer for running Windows programs in Linux.

      sudo apt-get install wine playonlinux

      9 – Clipboard Management

      By Default in ubuntu when u copy something from an application and closes the application u will not be able to access it from the clipboard. And also when u copy severals text in serial u only have the last on available to you in the clipboard. To solve that install either of the following but Glipper is better because it supports plugins.

      Glipper

      sudo apt-get install glipper

      Then right click ur panel → Add to Panel then drag Clipboard Manager to ur panel

      Parcellite

      sudo apt-get install parcellite

      10 – Archiver/ Packing software

      Windows equivalent : winrar, zip, 7zip

      Ubuntu equivalent : tar, unrar, p7zip, arj, unace

      It’s bad when you don’t have Internet on your computer/notebook, but you have to pack/unpack something but the file format isn’t recognized by the system. To prevent from this bad situation, you can install a bunch of packing software by typing this on the terminal:

      sudo apt-get install unace rar unrar zip unzip p7zip-full p7zip-rar sharutils uudeview mpack lha arj cabextract file-roller

      11 – Graphical web browser

      Windows equivalent : Internet explorer, firefox, opera

      Ubuntu equivalent : Firefox, opera, chromium

      Opera

      sudo apt-get install opera

      Firefox (installed by default intrepid)

      sudo apt-get install firefox

      Chromium (open source equivalent of Google Chrome)

      sudo apt-get install chromium-browser chromium-browser-l10n

      12 – Download Manager

      Windows equivalent : Free download manager

      Ubuntu equivalent : Multiget

      MultiGet is a http/ftp downloader with a nice GUI for linux desktop users. It can run on almost all desktops without any configuration. It has many powerful functions comparing to others.

      sudo apt-get install multiget

      Access it through Applications → Internet → MultiGet .

      13 – Graphical Email client

      Windows equivalent : Outlook

      Ubuntu equivalent : Evolution, Thunderbird

      Evolution (installed by default in maverick)

      sudo apt-get install evolution evolution-mapi

      Access it through Applications → Internet → Evolution Mail .

      Thunderbird

      sudo apt-get install thunderbird

      Access it through Applications → Internet → Mozilla Thunderbird Mail/News .

      14 – Instant Messanging protocal clients

      Windows equivalent : MSN messenger, Yahoo messenger, QQ, AIM, Gtalk, ICQ,IRC

      Ubuntu equivalent : Empathy, Pidgin, emesene

      Empathy IM Client (installed by default)

      Add the related launchpad repository :
      sudo add-apt-repository ppa:telepathy/ppa && sudo apt-get update

      Then install it by running the following :
      sudo apt-get install empathy telepathy-mission-control-5 telepathy-gabble telepathy-butterfly telepathy-haze telepathy-idle telepathy-salut telepathy-sofiasip libtelepathy-farsight0 python-tpfarsight galago-eds-feed python-galago python-galago-gtk msn-pecan

      Access it through Applications → Internet → Empathy IM Client .

      Pidgin

      Pidgin is an easy to use and free chat client used by millions. Connect to AIM, MSN, Yahoo, and more chat networks all at once. Supported chat networks: AIM, Bonjour, Gadu-Gadu, Google Talk, Groupwise, ICQ, IRC, MSN, MySpaceIM, QQ, SILC, SIMPLE, Sametime, XMPP, Yahoo!, Zephyr

      Add the launchpad repository :
      sudo add-apt-repository ppa:pidgin-developers/ppa && sudo apt-get update

      Then install it :
      sudo apt-get install pidgin pidgin-data pidgin-lastfm pidgin-guifications msn-pecan pidgin-musictracker pidgin-plugin-pack pidgin-themes

      Access it through Applications → Internet → Pidgin Internet Messenger .

      Emesene only for MSN Messenger.

      Add the launchpad repository :
      sudo add-apt-repository ppa:bjfs/ppa && sudo apt-get update

      Then install it :
      sudo apt-get install emesene

      Access it through Applications → Internet → Emesene .

      15 – VOIP

      Windows equivalent : skype

      Ubuntu equivalent : skype

      Skype

      sudo apt-get install skype

      Access it through Applications → Internet → Skype.

      16 – Viewing PDF files

      Windows equivalent : Adobe Reader

      Ubuntu equivalent : Adobe Reader

      Adobe Reader

      sudo apt-get install acroread

      Access it through Applications → Office → Adobe Reader.

      17– Adobe Air

      wget http://airdownload.adobe.com/air/lin/download/latest/AdobeAIRInstaller.bin
      chmod +x ./AdobeAIRInstaller.bin

      sudo ./AdobeAIRInstaller.bin

      Access it through Applications → Accessories → Adobe Air Application Installer.

      18 – Music / MP3 / OGG Players

      Windows equivalent : iTunes, Winamp

      Ubuntu equivalent : Rhythmbox, Banshee, Amarok

      Rhythmbox

      sudo apt-get install rhythmbox

      Access it through Applications → Sound & Video → Rhythmbox Music Player.

      Banshee

      sudo apt-get install banshee banshee-extension-ubuntuonemusicstore banshee-extension-appindicator banshee-extension-lyrics banshee-extension-mirage

      Access it through Applications → Sound & Video → Banshee Media Player.

      Amarok

      sudo apt-get install amarok amarok-common

      Access it through Applications → Sound & Video → Amarok.

      19– Hard Disk Partitions Manager

      Windows equivalent : Symanted Partition Magic

      Ubuntu equivalent : GParted

      GParted

      sudo apt-get install gparted ntfsprogs menu ntfs-config

      Access it through System → Administration → Partition Editor.

      20 – Vector Graphics Editor

      Windows equivalent : Adobe Illustrator

      Ubuntu equivalent : Inkscape

      Inkscape

      sudo apt-get install inkscape

      Access it through Applications → Graphics → Inkscape Vector Graphics Editor.

      21 – Image Editor

      Windows equivalent : Adobe Photoshop, Paint.Net

      Ubuntu equivalent : GIMP

      GIMP

      Add the launchpad repository :
      sudo add-apt-repository ppa:matthaeus123/mrw-gimp-svn && sudo apt-get update

      Then install it with the following command :
      sudo apt-get install gimp gimp-data gimp-plugin-registry gimp-data-extras

      Access it through Applications → Graphics → GIMP Image Editor.

      PINTA

      Add the launchpad repository :
      sudo add-apt-repository ppa:moonlight-team/pinta && sudo apt-get update

      Then install it with the following command :
      sudo apt-get install pinta

      Access it through Applications → Graphics → Pinta Image Editor.

      22 – 3D Graphics Applications

      Windows equivalent : 3D Studio MAX

      Ubuntu equivalent : Blender

      Blender

      sudo apt-get install blender

      Access it through Applications → Graphics → Blender (windowed).

      23 – Simple Yet Advanced Text Editor

      Windows equivalent : Notepad ++

      Ubuntu equivalent : GEdit

      GEdit

      sudo apt-get install gedit gedit-plugins

      Access it through Applications → Accessories → Text Editor.

      24 – Office Applications

      Windows equivalent : Microsoft Office

      Ubuntu equivalent : OpenOffice

      OpenOffice

      sudo apt-get install openoffice.org

      Access it through Applications → Office

      25 – Microsoft Visio

      Windows equivalent : Microsoft Visio

      Ubuntu equivalent : Dia

      Dia

      sudo apt-get install dia

      Access it through Applications → Graphics → Dia Diagram Editor

      26 – Microsoft Project

      Windows equivalent : Microsoft Project

      Ubuntu equivalent : OpenProj

      OpenProj

      wget http://nchc.dl.sourceforge.net/sourceforge/openproj/openproj_1.4-2.deb && sudo dpkg -i openproj_1.4-2.deb

      Access it through Applications → Office → OpenProj

      27 – Development IDE

      Windows equivalent : Dreamweaver

      Ubuntu equivalent : Quanta, Kompozer, NetBeans

      Quanta

      sudo apt-get install quanta

      Access it through Applications → Programming → Quanta Plus

      Komposer

      sudo apt-get install kompozer nvu

      Access it through Applications → Internet → Kompozer

      NetBeans

      sudo apt-get install netbeans

      Access it through Applications → Programming → NetBeans IDE

      28 – Source Control Management

      Windows equivalent : TortoiseSVN

      Ubuntu equivalent : RabbitVCS

      RabbitVCS

      Add the launchpad repository :
      sudo add-apt-repository ppa:rabbitvcs/ppa && sudo apt-get update

      Then install it :
      sudo apt-get install rabbitvcs-nautilus
      killall nautilus

      Right Click on any folder or file and access the RabbitVCS submenu

      29 – Graphical FTP clients

      Windows equivalent : CuteFTP, SmartFTP

      Ubuntu equivalent : FileZilla

      FileZilla

      This is great FTP program, very complete, in my opinion, the best one for linux.

      On the terminal type:

      sudo apt-get install filezilla filezilla-common

      Access it through Applications → Internet → FileZilla FTP Client.

      30 – P2P Clients / Servers, File Sharing

      Windows equivalent : utorrent, azureus, emule

      Ubuntu equivalent : Deluge, azureus, amule

      Bittorent clients

      Deluge (written in python)

      Add the launchpad repository :
      sudo add-apt-repository ppa:deluge-team/ppa && sudo apt-get update

      Then install it :
      sudo apt-get install deluge-torrent

      Access it through Applications → Internet → Deluge Torrent.

      Azureus: Uses Java to run, very complete but a bit heavy

      sudo apt-get install azureus

      Access it through Applications → Internet → Azureus.

      Emule Donkey Clients

      Amule

      Add the launchpad repository :
      sudo add-apt-repository ppa:happyaron/amule-dlp && sudo apt-get update

      Then install it with the following command :
      sudo apt-get install amule-dlp amule-dlp-gnome-support amule-dlp-utils-gui amule-dlp-daemon

      Access it through Applications → Internet → aMule.

      31 – Programs for CD burning with GUI

      Windows equivalent : Nero, Roxio Easy CD Creator

      Ubuntu equivalent : K3b, Brasero

      K3b

      Nero is available for linux,but its not free.A trial is available for 1 month usage and later it asks or activation code.But K3B is as good as Nero.Have a good feature set as Nero.

      sudo apt-get install k3b k3b-data libk3b6

      Access it through Applications → Sound & Video → K3B.

      Brasero (installed by default in Maverick)

      sudo apt-get install brasero

      Access it through Applications → Sound & Video → Brasero Disc Burning .

      33 – Install Vista like gadgets.

      Windows equivalent : Vista Sidebar

      Ubuntu equivalent : google-gadgets

      Google gadgets

      sudo apt-get install google-gadgets-gtk

      This will complete the installation.

      Now press Alt+F2, and type “ggl-gtk” to start them. You should see a small icon show up in your system tray, and a sidebar. Right click on any of them and select ‘Add Gadgets’ to show a menu. If you’d like to have Google Gadgets start automatically, go to System – Preferences – Session, click ‘Add’, paste ‘Google Gadgets’ for the name and ‘ggl-gtk’ for the command. Click OK and Close, and you’re good to go.

      34 – Google Desktop

      Google Desktop allows one to full text search of a user’s e-mail, computer files, music, photos, chat, and Web pages viewed,OpenOffice documents , PDF files and more .

      Now similar tools already existed on Linux like beagle (supported by novell ) , meta tracker etc . However Google Desktop search is not based on any of these tools and uses its proprietary algorithms to search for files on the computer ,also being 1.0 release and more stable then these products it could be preferred over tools like beagle .

      To install Google Desktop Search type the following command in the terminal window : -

      sudo apt-get install google-desktop-linux

      Access it through Applications → Google Desktop → Google Desktop

      Now after choosing appropriate option through Applications → Google Desktop → Google Desktop Preferences, you would find Google Desktop icon in the bar at the top of the screen , now it would automatically scan and index files on computer and store it in local database which could be searched using web browser .

      35 – Photo Management

      Google Picasa

      Google Picasa is an extremely professional good looking photo management application available on Windows ,Linux and Mac OS. Now Google Picasa has a number of features that many photo management software on Linux dont have further Google Picasa looks very user friendly as compared to similar open source application available on linux . Now Google Picasa for Linux is not a native linux application but runs on Linux thru application layer called wine which allows many windows application to run flawlessly on Linux.

      Now to install Google – Picasa type the following command in the terminal window

      wget http://dl.google.com/linux/deb/pool/non-free/p/picasa/picasa_3.0-current_i386.deb && sudo dpkg -i picasa_3.0-current_i386.deb

      Access it through Applications → Graphics → Picasa → Picasa

      36 – Map Viewing and Management

      Google Earth

      To install Google Earth type the following command in the Terminal Window.

      sudo apt-get install googleearth

      After downloading is over you will get a screen like this press ¨Yes¨ to accept the license agreement and complete software installation.

      Now you can launch Google Earth from Application → Internet → Google Earth

      37 – Gmail Notification

      Checkgmail

      If you would like to get notified when you have a new mail in your google mail account, checkgmail is for you. To install Checkgmail type the following command in the Terminal Window.

      sudo apt-get install checkgmail

      Now you can launch it from Application → Internet → CheckGmail

      38 – Configure Firewall
      If you are concern about your security, then it is pertinent that you activate the firewall and prevent any unauthorized access to your computer.

      UFW is installed by default, but if you need a graphical interface, install GUFW.

      sudo apt-get install gufw

      39– Gnome Do

      Gnome Do is a small application that allows you to search and do things faster and more efficiently in your Ubuntu machine. It is similar to QuickSilver in Mac and Launchy in Windows. For those who have not tried Gnome Do before, it might take some time for you to get used to it. But once you’re hooked to it, there will be no turning back for you.Gnome Do also comes with a dock interface that you can use it like any other docks.

      sudo apt-get install gnome-do

      Now you can launch it from Application → Accessories → Gnome Do

      40 – Ubuntu Tweak

      Ubuntu Tweak allows you to tweak your system settings, all in one place. You can install new applications, customize your desktop settings, configure your startup applications, changing the system filetype association and many more tweaks in this single application.

      Add the launchpad repository :
      sudo add-apt-repository ppa:ubuntu-tweak-testing/ppa && sudo apt-get update

      Then install it with the following command :
      sudo apt-get install ubuntu-tweak

      Then access it through Applications → System Tools → Ubuntu Tweak

      App Runner

      App Runner is a small open source utility that makes it very easy to run any type of program/executable/script on any distro/OS that uses the nautilus file manager: Debian/Ubuntu/Super OS/Fedora/etc

      wget http://hacktolive.org/files/app_runner/App_Runner_0.2.deb && sudo dpkg -i App_Runner_0.2.deb

      Then right-click the file -> Scripts -> Run This App or Run This App (root)

      0

      Increase Your Computer Performance

      Another product by Piriform. CCleaner is an optimization and Cleaning tool for cleaning your Windows. I have been using this software since I was in secondary school and guess what, two thumbs up i give to this software.


      Strictly speaking, every time we use our computer, the system need to save or preserve some space that what we call 'cached memory'. The purpose of using this space is actually to enhance the processing speed of computer but prolong usage of this capacity leads to insufficient space for temporary memory storage of computer.

      Usually, what peoples will do is that, they will clear all the unnecessary data manually but you have to be more careful for not deleting the important data such as files in windows directory.

      CCleaner provides user friendly Graphic User Interface where you can select which system of program that you want to clean. For instance, the browsing history and cached memory built when you are streaming video online.

      Here is some item that you can choose to clean from your system. You can select whether to clean your windows application or other software installed in your machine. As I mention before, every software installed in our machine will consume certain amount of 'cached' memory. By cleaning away the memories, you will notice the differences in term of your computer's speed and performance.

      Enjoy using this software. Here is the download link for the software.
      0

      Read Quran Online

      This is a story, told by a friend of mine few years ago
      An old man, sitting on a chair, reading the Holy Quran near the chimney. By the time he was reciting the Quran, his grandson comes closer to him.
      Suddenly, the grandson asked

      grandson: "why are you reading the Quran? Do you understand what is written in it?"

      The grandpa smile and said
      grandpa: "Danielle... come here, and take the metal basket near the chimney"

      Without questioning the order, Danielle takes the rusting black metal basket and bring it to his grandpa.

      grandpa: "okay, I want you to use this basket to take the water from the river. You can only come to me when the basket is fully filled with water from that river"

      Without wasting the time, Danielle runs to the river and do what has been told by his grandpa. After almost half an hour struggling to fill the basket with water, he gets angry and feeling like being cheated by his grandpa. With full of anger, Danielle runs to his grandpa, carrying the metal basket.

      The grandpa smiles and says: "Looks, what you have done to the basket? See, now it is clean and shiny..... Same goes with reading Quran, though we don't understand the meaning, it is actually the process of 'cleaning' your soul. With Quran, you will be showered with blessing and salvation. With Quran, a great leader will be born and with Quran, you'll be forever under His love and mercy.

      So guys, what do you think about the story? A reminder for me, Quran the source of calmness and when you are misery, source of energy when you are weak.

      Let's read Quran. To start reading, click here


      Copyright 2010 nota komputer aku